
Edge Node Operator Guide
This guide will walk you through everything you need to get your edge node up and running - from installation to day-to-day management. By running a node, you’re contributing compute, bandwidth, and cache capacity to the Evolving Edge computing cloud and earning income for every workload you serve.
Before You Begin
Section titled “Before You Begin”Residency Requirement
Section titled “Residency Requirement”Node operators must currently reside in the United States to participate in the Evolving Edge computing cloud.
System Requirements
Section titled “System Requirements”Make sure your device meets the following minimum specs before getting started:
Hardware
| Component | Minimum |
|---|---|
| CPU | Dual-core |
| RAM | 4 GB |
| Storage | 10 GB available |
Edge AI Inference hardware requirements are coming soon.
Supported Operating Systems
- macOS 12 Monterey or later
- Windows 10 or later
- Linux Kernel 3.2 or later
Create an Account First
Section titled “Create an Account First”You’ll need an Evolving Edge account to authorize your node. For the smoothest experience, create your account before starting the installation. See the account setup page for details.
Installation
Section titled “Installation”Choose the installation method that works best for you.
Option 1 - Command Line (Recommended)
Section titled “Option 1 - Command Line (Recommended)”This is the fastest way to get up and running. If you’d like to review the install script before running it, you can inspect it here:
https://cp.3dge.app/install.shLinux / MacOS
curl -fsSL https://cp.3dge.app/install.sh | shWindows (PowerShell)
irm https://cp.3dge.app/install.ps1 | iexNon-Interactive Install (for automated setups)
curl -fsSL https://cp.3dge.app/install.sh | sh -s -- -yWhat Happens During Installation
Section titled “What Happens During Installation”The installer detects your operating system and architecture automatically, then walks you through three steps:
Step 1 - Download the edge node binary
EE-CDN Edge Node Installer══════════════════════════════════════════════════════════════  OS:            Linux  Architecture:  amd64  Install to:    ~/.ee-cdn/bin  Control plane: Connected  Mode:          Tokenless (device auth)
Step 1/3 — Download edge-node binary from Control Plane [Y/n]
Downloading from Control Plane... ✓ Checksum verified ✓ Binary installed to ~/.ee-cdn/bin/edge-node ✓ Version: 0.0.10Step 2 - Authenticate your device
You’ll be prompted to visit the portal to verify your node:
Step 2/3 — Authenticate via device flow
=== Edge Node Authentication ===Code: XXXX-XXXXURL:  https://cp.3dge.app/device?user_code=XXXX-XXXXWaiting for authorization...
Visit the URL shown, log in (or create an account if you haven’t yet), and authorize the device. Then return to your terminal.
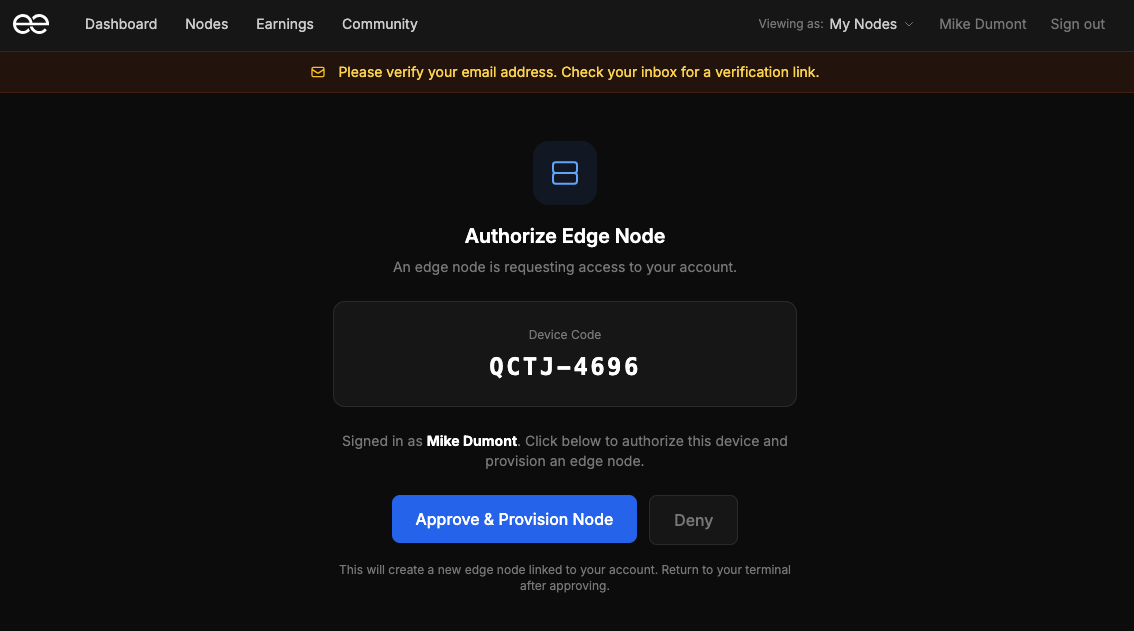
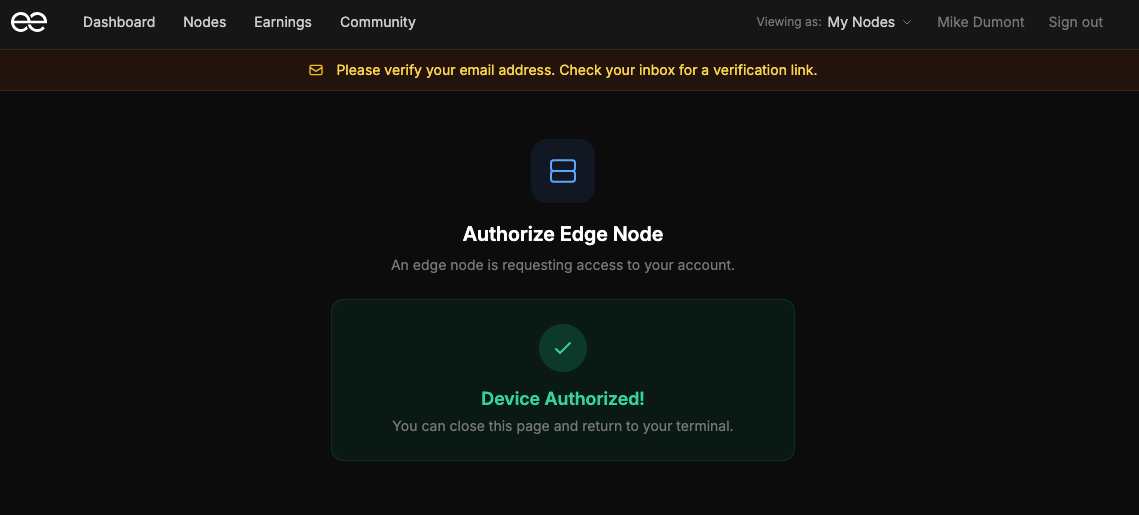
You’ll see confirmation of a successful enrollment:
[Auth] Node enrolled: XXXXXXXX-XXXX-XXXX-XXXX-XXXXXXXXXXXX[Auth] Control plane: ✓[Auth] Config saved to ~/.ee-cdn/config.encStep 3 - Choose your cache size and install as a service
You’ll be asked how much disk space to allocate for caching:
How much disk space should this node use for caching? 1) 1 GB 2) 5 GB 3) 10 GB (default) 4) 25 GB 5) 50 GBChoose [1-5]: 3Then you’ll be prompted to install as a system service. We strongly recommend saying yes - this keeps your node running in the background and ensures it restarts automatically when your device reboots.
Good to know: Uptime contributes to your payout calculation, so keeping the service running matters.
Step 3/3 — Install as system service (auto-start on boot)? [Y/n]Once complete, you’ll see a status summary confirming everything is healthy:
Edge Node Status  Node ID:    XXXXXXXX-XXXX-XXXX-XXXX-XXXXXXXXXXXX  Status:     healthy  Region:     auto  Port:       8080
Cache  Size:       0 B / 10.0 GB (0%)  Workloads:  0
Traffic  Requests:   0  Bytes:      0 B  Peer Hits:  0
══════════════════════════════════════════════════════════════  EE-CDN Edge Node setup complete!══════════════════════════════════════════════════════════════
That’s it - your node is live!
Option 2 - Docker
Section titled “Option 2 - Docker”Docker Compose (Recommended)
Section titled “Docker Compose (Recommended)”Download, install, and launch an edge node with one command:
curl -fsSL https://cp.3dge.app/docker-compose.yml -o docker-compose.yml && docker compose up -dOr download the docker-compose.yml file and run:
docker-compose up -dDocker Command
Section titled “Docker Command”The Docker image is available here:
https://hub.docker.com/r/eecdn/ee-cdn-edge
Run the following command:
First create a machine ID file. Keep this file — it is what lets the container hold one node identity across recreations:
uuidgen | tr -d '-' > ~/edge-node-machine-idOn Windows, in PowerShell:
[guid]::NewGuid().ToString('N') | Out-File -Encoding ascii $HOME\edge-node-machine-idThen create the volume and start the node:
docker volume create edge-data
docker run -d \  --name edge-node \  --hostname edge-node \  --restart unless-stopped \  -p 8080:8080 \  -v edge-data:/data \  -v ~/edge-node-machine-id:/etc/machine-id:ro \  -e PORT=8080 \  -e HOST=0.0.0.0 \  -e HEARTBEAT_SECONDS=30 \  -e CONTROL_PLANE_URL=https://cp.3dge.app \  docker.io/eecdn/ee-cdn-edge:latest
The fixed hostname and the machine ID file are what keep this container’s node identity stable when it is recreated. Without them the node enrolls again as a new node, with no Active Node Hours, every time the container is replaced.
Create the machine ID file before running the command. If the path does not exist, Docker creates a directory there instead of mounting the file, and the node behaves as though no machine ID were set at all. See Node Identity.
Portainer
Section titled “Portainer”You can deploy this as a Portainer Stack by pasting the Compose YAML into Portainer’s Web editor. The stack creates a persistent named Docker volume for node data and publishes the edge service on port 8080. docs.portainer
Before you begin
Make sure:
- Portainer is connected to the Docker host where you want the edge node to run.
- Port 8080 is available on that host. If it is already used, change the left side of the mapping—for example,
8081:8080. - The host has outbound HTTPS access to
https://cp.3dge.app. - You have an edge-node identity/API credentials available if the service requires registration.
Create the stack
-
Sign in to Portainer and select the target Docker environment.
-
In the left navigation, open Stacks.
-
Click Add stack.
-
Enter a descriptive stack name, such as:
evolving-edge-node -
Choose Web editor.
-
Paste the Compose configuration found here: https://cp.3dge.app/docker-compose.yml
-
Click Deploy the stack.
Portainer supports defining a stack directly in the Web editor using Docker Compose syntax; it also supports upload and Git-based deployment methods. docs.portainer
Confirm it started
- Return to Stacks and open
3dge-edge-node. - Confirm the
edge-nodecontainer is shown as running. - Open the container, then select Logs.
- Check for successful startup, control-plane connection, and any registration/login prompts.
For a quick host-level test, browse to:
http://DOCKER_HOST_IP:8080Whether this returns a useful page depends on the image’s API/health-endpoint design; a successful container state and logs are the primary checks.
Register the node
After deploying the stack, retrieve the activation information from the container logs:
- In Portainer, open Stacks from the left sidebar.
- Select the
3dge-edge-nodestack. - Open the
edge-nodecontainer. - Select Logs.
- Look for log entries containing the Activation ID and Activation URL.
- Open the activation URL in a browser and complete the registration flow, using the Activation ID if prompted.
If the activation details do not appear immediately, wait 15–30 seconds and refresh the log view. You can also use the Follow logs option to stream new output as the node starts.
Do not delete the edge-data volume after activation: it stores the container’s persistent node data, including registration-related state.
Persistence and updates
- The
edge-datanamed volume persistsdataeven if the container is recreated. restart: unless-stoppedbrings the container back after Docker or host restarts, unless you explicitly stop it.- To update the image later, redeploy the stack after pulling the current
latestimage, or use Portainer’s image/container management workflow. The persistentedge-datavolume should remain intact—do not remove it unless you deliberately want to reset the node’s local state.
Dockge
Section titled “Dockge”You can deploy the edge node in Dockge as a Compose stack, then retrieve its Activation ID and Activation URL from the service logs. Dockge is specifically a Compose-focused, stack-oriented Docker manager, so this workflow maps directly to the supplied YAML. hub.docker
Before you begin
Confirm that:
- Dockge is connected to the Docker host where the edge node should run.
- Port 8080 is available on that host. If it is occupied, change the mapping to something such as
"8081:8080". - The Docker host can make outbound HTTPS connections to
https://cp.3dge.app. - You will keep the
edge-datanamed volume. It persists/dataacross container recreation and updates.
Create the stack
-
Open the Dockge web UI.
-
Select Compose or Stacks in the sidebar, depending on your Dockge version.
-
Click New Compose.
-
Name the stack:
3dge-edge-node -
In the Compose editor, paste the contents of the docker compose file found here:
`https://cp.3dge.app/docker-compose.yml`- Click Deploy or Up.
Dockge stores and manages Compose stacks as Compose YAML files, commonly beneath its configured stacks directory (by default /opt/stacks), and invokes Docker Compose to manage the stack. hub.docker
Get activation details
After deployment:
- Open the
3dge-edge-nodestack in Dockge. - Locate the
edge-nodeservice/container. - Open Logs.
- Look for the Activation ID and Activation URL in the startup output.
- Open the Activation URL in a browser.
- Complete activation, entering the Activation ID if the registration page requests it.
If the activation entry is not present yet, wait 15–30 seconds, refresh the log view, or enable live log streaming if your Dockge version provides it.
Verify and manage
- Confirm the
edge-nodeservice shows as running after activation. - Use the stack’s Logs view for connectivity or registration troubleshooting.
- Use Restart to restart the service after a configuration change.
- Use Update or edit the Compose YAML and redeploy to apply changes.
- Do not remove the
edge-dataDocker volume unless you intentionally want to reset the node’s local state.
The restart: unless-stopped setting tells Docker to restart the container after Docker or host restarts unless you have explicitly stopped it.
Home Assistant App (Coming Soon)
Section titled “Home Assistant App (Coming Soon)”You’ll be able to use your existing Home Assistant instance to participate in the Edge Computing Cloud.
NAS Devices
Section titled “NAS Devices”Running a node on a NAS is a great way to contribute to the network without tying up a primary machine. Below are instructions for popular NAS platforms. Note that we’re unable to provide direct technical support for third-party environments - but our Discord community and the platform-specific communities are great places to get help.
For video walkthroughs from popular creators, check out the Resources page.
TrueNAS Scale
Section titled “TrueNAS Scale”Retrieve the contents of the Docker Compose file here: https://cp.3dge.app/docker-compose.yml
Before you begin
- Confirm the TrueNAS host has outbound HTTPS connectivity to
https://cp.3dge.app. - Ensure TCP port 8080 is not already in use by another app.
- Decide which pool will hold persistent edge-node state. This guide uses
tank, but replace it with your pool name.
Create persistent storage
-
Go to Datasets.
-
Select your pool, such as
tank. -
Click Add Dataset.
-
Name it:
appdata/ee-cdnThis produces the host path:
/mnt/tank/appdata/ee-cdn -
Save the dataset.
Use this dataset only for the edge node’s persistent /data directory. Do not mount it read-only: the application must be able to write node state and activation information.
Deploy the custom app
-
Open Apps → Discover Apps.
-
Click the three-dot menu next to Custom App, then select Install via YAML.
-
Set the application name to a lowercase name such as:
ee-cdn-edge -
Paste the contents of the Docker Compose file into Custom Config, replacing
tankwith your actual ZFS pool name, found here:
https://cp.3dge.app/docker-compose.yml`- Click Save to pull the image and deploy the app.
The key change from the upstream Compose file is:
- /mnt/tank/appdata/ee-cdn:/dataThis bind-mounts the ZFS dataset into the container at /data; it replaces the original edge-data:/data named-volume declaration. TrueNAS documents host-path mounts as the recommended on-disk persistence approach for production deployments. apps.truenas
Activate the edge node
- Go to Apps → Installed.
- Select
ee-cdn-edge. - Open its Logs.
- Wait for the container startup output, then locate the Activation ID and Activation URL.
- Open the Activation URL in a browser.
- Complete the activation flow, entering the Activation ID if requested.
If those lines do not appear immediately, wait 15–30 seconds and refresh or follow the app logs.
Verify and maintain
-
Confirm the app status is Running after activation.
-
Use the app’s Logs screen to troubleshoot connectivity or registration issues.
-
To update the configuration, edit/redeploy the YAML app rather than manually modifying internal TrueNAS app-storage paths.
-
Keep
/mnt/tank/appdata/ee-cdnintact during updates and reinstallations; deleting it intentionally resets the node’s persisted state. -
If port 8080 is occupied, change only the host side of the mapping, for example:
ports:- "8081:8080"
The TrueNAS YAML editor accepts Docker Compose configuration with a top-level services: key and deploys it when you click Save. apps.truenas
Unraid
Section titled “Unraid”Before you begin
-
Confirm port 8080 is not already assigned to another Unraid container.
-
Ensure the Unraid host can make outbound HTTPS connections to
https://cp.3dge.app. -
Use the canonical Compose file as the configuration source: https://cp.3dge.app/docker-compose.yml.
-
If you plan to replace the Compose named volume with an Unraid host path, create the directory first:
text
/mnt/user/appdata/ee-cdn
Install and deploy
-
In Unraid, open the Apps tab.
-
Search for and install Compose Manager / Docker Compose Manager.
-
Open Docker → Compose. Depending on the plugin/version, this may appear as Compose in the top navigation.
-
Click Add Stack.
-
Name the stack:
text
ee-cdn-edge -
Retrieve the canonical Compose file from cp.3dge.app/docker-compose.yml, then paste its contents into the stack editor.
-
Click Compose Up to pull
docker.io/eecdn/ee-cdn-edge:latestand start the stack. -
Confirm the stack and its
edge-nodecontainer show as running.
Compose Manager’s documented stack flow is Docker → Compose → Add Stack, followed by entering Compose YAML and selecting Compose Up.github
Optional Unraid storage path
The canonical Compose file uses the Docker named volume edge-data. That is valid on Unraid and is the simplest option.
If you prefer to keep edge-node state under Unraid’s usual appdata path, change only the volume mapping in the pasted Compose YAML:
volumes: - /mnt/user/appdata/ee-cdn:/dataRemove the top-level volumes: declaration for edge-data if it is no longer referenced:
volumes: edge-data:Do not use both mappings for /data. Use either the original named volume or the Unraid host-path mapping.
Activate and verify
- Go to Docker or Docker → Compose and open the
ee-cdn-edgestack/container. - Select Logs.
- Locate the Activation ID and Activation URL in the startup logs.
- Open the Activation URL in a browser and complete the activation flow.
- Enter the Activation ID if the activation page asks for it.
If the activation values do not appear immediately, wait 15–30 seconds, refresh the logs, or use live log streaming if available.
Manual Docker template
Use this only if you do not want to install a Compose-management plugin.
-
Open Docker → Add Container.
-
Set the container name to:
text
ee-cdn-edge -
Set Repository to:
text
docker.io/eecdn/ee-cdn-edge:latest -
Set the network type to Bridge.
-
Add a port mapping:
Field Value Name Edge Node HTTP Container Port 8080Host Port 8080Protocol TCP -
Add one persistent path mapping:
Field Value Name Edge node data Container Path /dataHost Path /mnt/user/appdata/ee-cdnAccess mode Read/Write -
Add these environment variables:
Key Value Key Value PORT8080HOST0.0.0.0HEARTBEAT_SECONDS30CONTROL_PLANE_URLhttps://cp.3dge.app -
Click Apply.
-
Open the new container’s Logs and complete activation using the displayed Activation URL and Activation ID.
Unraid maps host ports to container ports in Bridge mode, and its Docker configuration supports runtime environment variables and host-path storage mappings. Avoid changing the container port unless the application itself supports a different listening port; change only the host port to resolve a conflict.unraid
Operational note
Use Compose Down or stop the container before maintenance. Keep the named volume or /mnt/user/appdata/ee-cdn directory intact during updates: it contains the node’s persistent /data state.
Synology
Section titled “Synology”Use Container Manager Projects as the primary Synology method. It directly supports Docker Compose files, preserves the service definition as a project, and is easier to maintain than manually reproducing the configuration in the container wizard. kb.synology
Before you begin
- Install Container Manager from Package Center if it is not already installed.
- Confirm that port 8080 is not already used by another NAS service or container.
- Ensure the NAS has outbound HTTPS access to
https://cp.3dge.app. - Retrieve the canonical Compose configuration from docker-compose.yml.
- Identify your actual volume name. This guide uses
volume1; use the path that matches your NAS, such as/volume2/docker/....
Projects method
Create persistent storage
-
Open File Station.
-
Open the
dockershared folder—commonly located at:/volume1/docker -
Create a folder named:
ee-cdn -
Create a
datafolder inside it:/volume1/docker/ee-cdn/data
The resulting host directory for persistent node data is:
/volume1/docker/ee-cdn/dataCreate the directory before deployment. Synology’s Container Manager requires host paths to exist for bind-mounted storage.
Create the Compose project
-
Open Container Manager.
-
Select Project in the left navigation.
-
Click Create.
-
Enter these general settings:
Field Value Project Name ee-cdn-edgePath /volume1/docker/ee-cdnSource Create docker-compose.yml -
Retrieve the canonical YAML from cp.3dge.app/docker-compose.yml and paste it into the editor.
-
Replace the canonical named-volume mapping:
volumes:- edge-data:/datawith the Synology host-path mapping:
volumes:- /volume1/docker/ee-cdn/data:/data -
Remove the now-unused top-level named-volume declaration:
volumes:edge-data: -
Click Next, review the configuration, and select Done.
-
Choose Start project after creation when prompted.
Container Manager’s Project workflow supports setting a project name and working directory, then either uploading a Compose file or creating one with its editor. kb.synology
Activate the node
- In Container Manager → Project, select
ee-cdn-edge. - Open the
edge-nodecontainer/service. - Select Log.
- Locate the Activation ID and Activation URL in the startup output.
- Open the Activation URL in a browser and complete the activation workflow.
- Enter the Activation ID if the registration page requests it.
If the details do not appear yet, wait 15–30 seconds and refresh the log view.
Manual container method
Use this only if you do not want to use a Compose Project.
-
Open Container Manager → Registry.
-
Search for:
eecdn/ee-cdn-edge -
Download the
latestimage. -
Open Image, select
eecdn/ee-cdn-edge:latest, then click Run or Launch. -
Set the container name to:
ee-cdn-edge -
Open Advanced Settings and configure:
Setting Value Auto-restart Enabled Local port 8080Container port 8080Protocol TCP Host path /volume1/docker/ee-cdn/dataMount path /dataMount mode Read/Write -
Add these environment variables:
Variable Value PORT8080HOST0.0.0.0HEARTBEAT_SECONDS30CONTROL_PLANE_URLhttps://cp.3dge.app -
Click Next → Done, then start the container.
-
Open the container’s Log tab and use the displayed Activation URL and Activation ID to activate it.
Synology’s container wizard supports image selection, auto-restart, port mappings, volume mounts, and environment variables under advanced settings. kb.synology
Maintenance notes
-
Keep
/volume1/docker/ee-cdn/datawhen updating, restarting, or recreating the project; it contains the edge node’s persistent/datastate. -
If host port 8080 conflicts with another service, change only the host side of the mapping—for example:
ports:- "8081:8080" -
When using Projects, make configuration changes by editing the project Compose YAML and redeploying the project rather than changing the generated container manually.
QNAP QTS / QuTS Hero
Section titled “QNAP QTS / QuTS Hero”Use Container Station → Applications → Create as the primary method. QNAP’s Applications feature is designed to deploy one or more containers from Docker Compose YAML, and it includes YAML validation before deployment. qnap
Before you begin
- Install Container Station from App Center if it is not already installed.
- Confirm that TCP port 8080 is not in use by another Container Station application or QNAP service.
- Confirm the NAS can make outbound HTTPS connections to
https://cp.3dge.app. - Retrieve the canonical Compose file from docker-compose.yml.
- Identify the correct QNAP shared-folder path. This guide uses
/share/Container/ee-cdn; your NAS may expose a different shared-folder path.
Create persistent storage
-
Open File Station.
-
Create a folder for the node’s persistent application data, for example:
/share/Container/ee-cdnAlternatively, create it inside an existing shared folder, such as:
/share/<volume-or-share-name>/ee-cdn -
Ensure the folder is writable by Container Station.
A host-path bind mount is preferable here because the edge-node state is visible, can be included in NAS backups/snapshots, and remains available if the application is recreated. Container Station supports host-path bind mounts as well as Docker-managed volumes. qnap
Deploy as an application
-
Open Container Station.
-
Select Applications in the left navigation.
-
Click Create.
-
Enter an application name using lowercase letters, numbers, hyphens, or underscores:
ee-cdn-edge -
Retrieve the canonical YAML from cp.3dge.app/docker-compose.yml, then paste it into the Docker Compose YAML editor.
-
In the pasted YAML, replace the original named-volume mapping:
volumes:- edge-data:/datawith your QNAP persistent host-path mapping:
volumes:- /share/Container/ee-cdn:/data -
Remove the unused top-level named-volume declaration:
volumes:edge-data: -
Click Validate YAML and correct any reported formatting errors.
-
Click Create to pull the image and deploy the application.
The important resulting configuration is that the container’s /data directory maps to the NAS folder:
- /share/Container/ee-cdn:/dataQNAP documents the Applications workflow as Applications → Create → application name → Docker Compose YAML → Create, with optional YAML validation. qnap
Activate the edge node
- In Container Station, open Applications.
- Select
ee-cdn-edge. - Open the
edge-nodecontainer/service details. - View Logs.
- Find the Activation ID and Activation URL in the startup output.
- Open the Activation URL in a browser and complete the activation flow.
- Enter the Activation ID if the registration flow requests it.
Wait 15–30 seconds and refresh the logs if the activation information has not appeared yet.
Verify and maintain
-
Confirm the
edge-nodecontainer is running. -
Review Logs if startup, connectivity, or activation fails.
-
Preserve
/share/Container/ee-cdnwhen updating or recreating the application; it holds persistent edge-node state. -
Make future configuration changes by editing the application’s Compose YAML and applying the updated configuration.
-
If port 8080 conflicts with another application, change only the host port:
ports:- "8081:8080"
Container Station supports Compose applications directly; it also supports normal individual-container configuration with bind mounts, environment variables, and port mappings if a manual fallback is needed. qnap
Umbrel
Section titled “Umbrel”Umbrel
The recommended Umbrel installation method is to add the Evolving Edge Community App Store and install the edge node from the catalog. Umbrel Community App Stores distribute packaged apps—including their Compose configuration—through a Git repository, so users do not need to manually copy the canonical Compose file. github
Install from the Community App Store
-
Open the Umbrel dashboard.
-
Go to App Store.
-
Open Community App Stores. Depending on your umbrelOS version, this may appear under Settings → App Store → Add Community Store.
-
Click Add Community App Store.
-
Paste this repository URL:
https://github.com/evolving-edge/evolving-edge-umbrel-community-app-store -
Click Add.
-
Return to the App Store and search for Evolving Edge, 3DGE, or the edge-node app name.
-
Open the app listing and click Install.
-
Wait for Umbrel to download the image and start the app.
Community App Stores allow developers to distribute Dockerized Umbrel applications outside the official App Store, and Umbrel supports adding a store by supplying its Git repository URL. github
Activate the edge node
- From the Umbrel home screen, open the installed edge-node app.
- Open the app’s Logs or View logs option.
- Locate the Activation ID and Activation URL in the startup output.
- Open the Activation URL in a browser.
- Complete the activation workflow, entering the Activation ID if prompted.
If activation details are not visible immediately, wait 15–30 seconds and refresh the logs.
Persistent data
Umbrel’s app package manages its own Compose configuration and persistent app-data location. Do not delete the app’s data directory when updating, restarting, or reinstalling unless you intentionally want to reset the edge node’s persistent state and activation data.
Manual Compose reference
For users who need to inspect the canonical Docker Compose configuration, it is available at cp.3dge.app/docker-compose.yml. The Community App Store installation is preferred because it is packaged for Umbrel and removes the need to manually translate Docker volume paths or Compose settings.
UGREEN UGOS Pro
Section titled “UGREEN UGOS Pro”Use Docker → Projects for the recommended installation path. A Compose project preserves the canonical configuration in one editable deployment and avoids manually re-creating the image, port, storage, restart policy, and environment variables. UGOS Pro supports Docker on compatible DXP-series systems, while some ARM-based UGOS models do not support Docker.
Before You Begin
- Confirm your UGREEN NAS model and UGOS version support Docker.
- Open App Center and install Docker or Container Manager if it is not already installed.
- Verify that port 8080 is unused.
- Ensure the NAS can reach
https://cp.3dge.appover outbound HTTPS. - Retrieve the canonical Compose file from docker-compose.yml.
Create Persistent Storage
-
In UGOS, create or identify a shared folder for Docker app data, such as:
appdata -
Create an application-specific subfolder:
ee-cdn -
Use the UGOS host path for that shared folder in the Compose configuration. On UGOS Pro, shared folders are generally available to Docker as
/media/<share-name>, for example:/media/appdata/ee-cdn -
Ensure the Docker service can write to that folder.
For this deployment, persistent container data belongs at /data; map that container path to the NAS folder you created. Host-path storage keeps the node’s state outside the disposable container.
Deploy With Projects
-
Open Docker from the UGOS application menu.
-
Select Projects.
-
Click Create.
-
Name the project:
ee-cdn-edge -
Choose a project directory, such as:
/media/appdata/ee-cdn -
Retrieve the canonical Compose YAML from cp.3dge.app/docker-compose.yml, then paste it into the project editor.
-
Replace the canonical named-volume mapping:
volumes:- edge-data:/datawith the UGOS bind mount:
volumes:- /media/appdata/ee-cdn:/data -
Remove the now-unused top-level Docker named-volume section:
volumes:edge-data: -
Click Deploy.
-
Confirm that the
edge-nodecontainer starts and shows a running status.
Docker Compose project definitions include the image, ports, persistent mounts, environment variables, and restart policy in a single reusable YAML file. ai.ugreen
Activate The Edge Node
- In Docker → Containers or the
ee-cdn-edgeproject details, open theedge-nodecontainer. - Select Logs.
- Find the Activation ID and Activation URL in the startup output.
- Open the Activation URL in a browser.
- Complete the activation flow, entering the Activation ID if requested.
If the activation information is not visible immediately, wait 15–30 seconds and refresh or follow the logs.
Single Container Method
Use this only if the Projects/Compose feature is unavailable.
-
Open Docker → Container → Create.
-
Set the image to:
docker.io/eecdn/ee-cdn-edge:latest -
Name the container:
ee-cdn-edge -
Enable automatic restart.
-
Configure the port mapping:
Host port Container port Protocol 80808080TCP -
Configure persistent storage:
Host path Container path Access /media/appdata/ee-cdn/dataRead/Write -
Add these environment variables:
Variable Value PORT8080HOST0.0.0.0HEARTBEAT_SECONDS30CONTROL_PLANE_URLhttps://cp.3dge.app -
Click Apply or Create to start the container.
-
Open its logs and complete activation with the shown Activation URL and Activation ID.
Maintenance Notes
-
Preserve
/media/appdata/ee-cdnduring restarts, updates, and container recreation; it contains the persistent/datastate. -
If port 8080 is unavailable, change only the external/host port, for example:
ports:- "8081:8080" -
Make Compose configuration changes by editing and redeploying the Project, rather than changing the generated container manually.
ZimaOS / CasaOS
Section titled “ZimaOS / CasaOS”Use Install a Custom App to deploy the edge node from its Docker Compose configuration. ZimaOS and CasaOS custom applications are Compose-based, allowing you to import a Docker Compose YAML file directly through the App Store interface.
Before You Begin
-
Confirm that port 8080 is not already assigned to another app.
-
Ensure the host can make outbound HTTPS connections to
https://cp.3dge.app. -
Retrieve the canonical Compose configuration from docker-compose.yml.
-
Create a persistent data directory for the edge node:
/DATA/AppData/ee-cdnIf your installation uses a different data disk or mount path, use the equivalent location on that disk.
Import The Custom App
-
Open the App Store.
-
Click Install a Custom App. In some ZimaOS versions, click the + button on the dashboard and select Install a customized app.
-
Select Import.
-
Open the Docker Compose tab.
-
Retrieve the canonical YAML from cp.3dge.app/docker-compose.yml, then paste it into the editor.
-
Replace the canonical named-volume mapping:
volumes:- edge-data:/datawith the ZimaOS/CasaOS host-path bind mount:
volumes:- /DATA/AppData/ee-cdn:/data -
Remove the unused named-volume declaration at the end of the YAML:
volumes:edge-data: -
Click Submit.
-
Review the imported app settings.
-
Set the app name to:
ee-cdn-edge- Verify that the storage mapping shows
/DATA/AppData/ee-cdnon the host and/datainside the container. - Click Install.
ZimaOS documents this flow as Install a customized app → Import → Docker Compose → paste YAML → Submit. zimaspace
Activate The Edge Node
- Open the installed
ee-cdn-edgeapp from the dashboard. - Open the container’s Logs or View logs panel.
- Find the Activation ID and Activation URL in the startup output.
- Open the Activation URL in a browser.
- Complete the activation workflow, entering the Activation ID if requested.
If the information has not appeared yet, wait 15–30 seconds and refresh the log view.
Storage And Updates
-
Keep
/DATA/AppData/ee-cdnwhen restarting, updating, or reinstalling the application. It holds the persistent edge-node/datastate. -
Use only the basic bind-mount syntax shown above—
/host/path:/container/path. The ZimaOS web UI may not support Docker mount options such as:roor:shared, though this edge-node mapping does not require them. community.zimaspace -
If port 8080 is already in use, change only the host-side port mapping:
ports:- "8081:8080" -
For future configuration changes, re-import or edit the custom app’s Compose configuration rather than modifying the generated container directly.
OpenMediaVault (OMV)
Section titled “OpenMediaVault (OMV)”Use the openmediavault-compose plugin to deploy the edge node. It provides Docker Compose management directly in the OMV web interface and is the recommended OMV workflow for Compose-based applications. wiki.omv-extras
Before You Begin
- Confirm port 8080 is not already assigned to another service or container.
- Ensure the OMV host can make outbound HTTPS connections to
https://cp.3dge.app. - Retrieve the canonical Compose file from docker-compose.yml.
- Plan to store Docker data on a data disk, SSD, or array—not the OMV operating-system disk. The Compose plugin can relocate Docker storage from the default
/var/lib/dockerpath. wiki.omv-extras
Install OMV-Extras
-
SSH into the OMV server as
root, or run the command through OMV’s System → Scheduled Jobs / command-line access. -
Install OMV-Extras:
Terminal window wget -O - https://github.com/OpenMediaVault-Plugin-Developers/packages/raw/master/install | bash -
Wait for the script to finish, then refresh the OMV web interface.
This is the installation command published by OMV-Extras for OMV. omv-extras
Enable Docker And Compose
-
In the OMV web interface, go to System → OMV-Extras.
-
Select Docker Repo.
-
Click Save and apply pending configuration changes.
-
Go to System → Plugins.
-
Search for:
openmediavault-compose -
Select the plugin version appropriate to your OMV release—such as
openmediavault-compose 7.xon OMV 7—and click Install. -
Wait for installation to complete and apply any pending changes.
Enabling the Docker repository makes Docker and the Compose plugin available; installing openmediavault-compose also installs its required dependencies. wiki.omv-extras
Configure Compose Storage
Before creating the edge-node Compose file, configure where OMV stores Compose definitions and Docker data.
-
Go to Storage → Shared Folders.
-
Create a shared folder named:
appdataPlace it on your preferred data disk or SSD.
-
Optionally create shared folders for:
composebackup-composedocker -
Go to Services → Compose → Settings.
-
Under Compose Files, select the
composeshared folder. This is where OMV stores generated Compose YAML and related.envfiles. -
Under Docker, set Docker Storage to the absolute path of your
dockershared folder rather than leaving it on the OS disk. -
Under Data, select the
appdatashared folder, then click Save and apply changes.
The Compose plugin stores Compose files in a user-selected folder and offers settings for Docker storage, application data, and backups. wiki.omv-extras
Create And Start The Edge Node
-
Go to Services → Compose → Files.
-
Click Add.
-
Set the name to:
ee-cdn-edge -
Retrieve the canonical Compose YAML from cp.3dge.app/docker-compose.yml, then paste it into the File editor.
-
Leave the original named-volume configuration intact:
volumes:- edge-data:/dataThis is the simplest supported configuration. Docker will manage the persistent
edge-datavolume. -
Click Save, then apply pending configuration changes.
-
Select the
ee-cdn-edgeCompose file and click Up. -
Confirm the
edge-nodeservice/container shows as running.
The OMV plugin’s Services → Compose → Files page is where you create, edit, start, stop, update, and otherwise manage Compose-defined containers. wiki.omv-extras
Activate The Edge Node
- Go to Services → Compose → Services.
- Select the
edge-nodeservice. - Open Logs.
- Find the Activation ID and Activation URL in the startup output.
- Open the Activation URL in a browser and complete activation.
- Enter the Activation ID if the activation page prompts for it.
If the activation information is not visible immediately, wait 15–30 seconds, then refresh or follow the service logs.
Updates And Maintenance
-
Preserve the
edge-dataDocker volume during updates and restarts; it holds the persistent/datastate. -
To update the image, select the Compose file or service, use Pull, then redeploy with Up. The plugin supports pulling updated images directly from its Compose management pages. wiki.omv-extras
-
If port 8080 conflicts with another service, edit only the host-side port mapping:
ports:- "8081:8080" -
Manage configuration changes in Services → Compose → Files instead of manually changing Docker-generated container settings.
Configuration
Section titled “Configuration”All configuration lives in ~/.ee-cdn/:
| File | Purpose |
|---|---|
config.enc |
Encrypted enrollment credentials (node ID, API key) |
settings.json |
Capacity, GPU, and remote config preferences |
cache/workloads/ |
Cached .ee workload files |
logs/ |
Edge node logs |
Settings
Section titled “Settings”You can adjust settings through the portal or the CLI:
| Setting | Default | Description |
|---|---|---|
capacity_bytes |
10 GB | Disk space allocated for content caching |
gpu_enabled |
false | Enable GPU compute (opt-in) |
allow_remote_config |
true | Allow the portal to push configuration changes |
webrtc_enabled |
true | Enable WebRTC for P2P content delivery |
Environment Variables
Section titled “Environment Variables”You can override any setting using environment variables:
| Variable | Default | Description |
|---|---|---|
PORT |
8080 | HTTP listen port |
HOST |
127.0.0.1 | Listen address (0.0.0.0 for LAN access) |
CAPACITY_BYTES |
10737418240 | Cache capacity in bytes |
CONTROL_PLANE_URL |
(from enrollment) | Control plane URL |
Service Management
Section titled “Service Management”# Startlaunchctl start ee-cdn-edge-node
# Stop~/.ee-cdn/bin/edge-node stop
# Reinstall service~/.ee-cdn/bin/edge-node install
# Check statuscurl http://localhost:8080/healthLinux (systemd)
Section titled “Linux (systemd)”# Startsystemctl --user start ee-cdn-edge-node
# Stopsystemctl --user stop ee-cdn-edge-node
# Statussystemctl --user status ee-cdn-edge-node
# View live logsjournalctl --user -u ee-cdn-edge-node -fAdditional systemd commands:
# Enable start on bootsystemctl enable ee-cdn-edge-node
# Disable start on bootsystemctl disable ee-cdn-edge-node
Verifying Your Node
Section titled “Verifying Your Node”Check Health
Section titled “Check Health”curl http://localhost:8080/health# Returns: {"nodeId":"...","status":"healthy"}Check Version
Section titled “Check Version”~/.ee-cdn/bin/edge-node versionView in the Portal
Section titled “View in the Portal”Visit portal.3dge.app to see your node’s status, cached content, and serving statistics.
How Content Delivery Works
Section titled “How Content Delivery Works”Here’s what’s happening under the hood once your node is running:
- Your node registers with the control plane and receives workload assignments
- Content is cached locally as
.eeworkload files - these are compressed and optionally encrypted bundles - When a browser needs content, it discovers your node via the WebTorrent tracker
- The browser establishes a WebRTC connection to your node - this works even behind NAT, so no port forwarding needed
- Your node serves compressed content pieces directly to the browser
- The browser decompresses and renders the content - no gateway required
- You get paid for every byte delivered
Automatic Updates
Section titled “Automatic Updates”Edge nodes update themselves automatically when a new version is available:
- The control plane reports the latest version in the heartbeat response
- Your node downloads the new binary from the release server
- The binary is atomically replaced
- The process exits and the service manager restarts with the new version
To check your current version at any time:
~/.ee-cdn/bin/edge-node versionNext Steps
Section titled “Next Steps”- Explore your dashboard - portal.3dge.app
- Join the community - discord.gg/KUGFX9a4Xn
- Spread the word - Invite others to join: portal.3dge.app/referrals
Have questions? Hop into Discord or submit a support request.